Pages

Saturday, October 27, 2012

My Blogger's Quilt Festival Fall 2012 entry


Pointless Lone Star
Measurements: 86 x 86 inches
Special techniques: No set in seams. Now that's special! Strip piecing.
Quilted by: Maggi Honeyman of Texas
Best category: Bed quilt
Pattern: Shades of Grey by Sarah Fielke from the August/September 2011 Quilters Newsletter magazine. Pattern can also be found here at Sarah's website.
My husband asked me to make a quilt for the wedding of one of his friend's. I thought I'd use the couple's favorite colors as a starting point, and then I found out they were purple (him) and pink (her). Hmmmm. I happened to see the pattern for this in Quilter's Magazine. It looked like it could be a fast and simple quilt with only four really huge blocks (36 inches square) and no set in seams, and I'd substitute a plain border for the pieced one. 


I pulled some pink and purple prints, and used them to choose the fabrics for the blocks. The original pattern duplicated fabrics and placement, but I didn't have that kind of yardage in my stash, and I wanted a more scrappy look so I made each block different. I was able to use fat quarters for the two rounds of inner diamonds, although I had to piece a couple scraps together to make a couple of the diamonds. When I was selecting fabrics, I needed some math skills to figure out which ones I had enough of for each round of diamonds, and that dictated some of the fabric placement too. I used a wide variety of fabrics from batiks, wovens, plaids, stripes and dots to novelty fabrics.


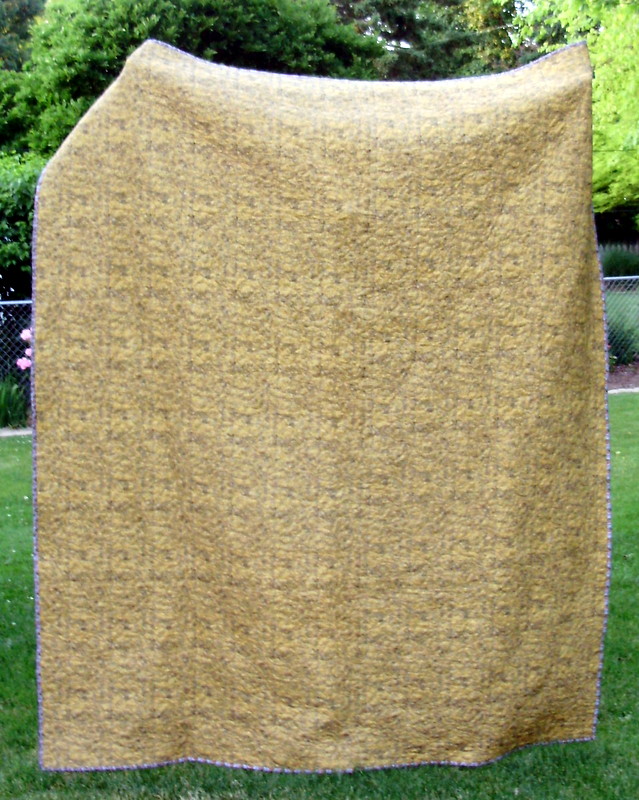
When I finished the blocks, I decided I didn't like the prints I had planned for the borders so they went on the back, and I went to the quilt shop. The navy and teal print I found has a pattern of birds and hearts on it, perfect in color and motif for this wedding quilt.

Maggi Honeyman did a wonderful job on her longarm. The setting triangles, which needed to read solid to balance the busyness of the star fabrics and give the eye a place to rest, seemed a little too boring compared to the rest of the quilt. Maggi fixed that by quilting special designs in those spaces.    

This was a fairly easy pattern, but probably not a beginner one. Especially if you switch it up like I did and have to recalculate yardage. For tips on making these kinds of points match, check out this post.  

I wanted to share this because I like seeing different takes on the same pattern. Seeing a quilt done in different colors and fabrics can make you fall in love with a pattern you hadn't given a second glance at before.

A big thank you to Amy for hosting the Blogger's Quilt Festival.

Sunday, October 21, 2012

Small pieces, large obsession

I saw this book mentioned on a blog in early summer (but can't remember where now) and was so taken by the cover quilt that I had the book in my hot little hands a few days later.

This is just a quarter of one of the four blocks. A sixteenth of a quilt. And it's big! Each block is nearly 40 inches square.

I have been happily digging through scraps cutting them into wedges for the arcs and piecing a bit here and there while I tried to stay focused on finishing that last top. I may not have as many lights as darks, and I'll have to wait until I have more sections done to see if that will be a problem. Although it requires applique, the amount should be manageable even for me!

Tuesday, October 16, 2012

A finish! Yeah!

I made a pillow after all. Only one strip of obviously A&M fabric going back into the scrap basket. I can deal with that!

And this top has been declared done because I've run out of pieces to make enough blocks for another row on either side. Binding and backing still to go. I try not to put the top aside until I have those done. I need to get in the habit of adding a label to that list. I'm such a bad labeler.

Top is 69 x 75, and it has been years in the making. I'm afraid to check the blog to see how many. It started out to be baby quilts for twins and they've started preschool. I switched gears so the boys got their baby quilts awhile ago, and this top languished despite the occasional four-patch and half-square triangles I made as leader-enders.

Saturday, October 6, 2012

Getting back to it

Wow. It's been a long time since I posted. Not too much sewing going on, but some. So let's get back in the posting swing of things with this finish.
Texas A&M zigzag quilt, 56 x 76.
The Texas A&M zigzag quilt for my niece is quilted, bound and soon to be mailed. I had pressed many of the seams open when I made the top, which caused me some distress when I was quilting. My plan was stitch in the ditch, which did not work well with those seams! I ended up stitching near the ditch not in it to make sure I caught the top fabric. I'll have to think things through more carefully next time.

Back of Texas A&M quilt, feet not included..
The back is leftover bits of the A& M fabric, which I don't want ending up in my scrap basket. Still have some little bits left. I was thinking maybe a pillow to get rid of them once and for all, but I really want to get this in the mail today so it might be the circular file for them. 

Sunday, August 5, 2012

An exhibit worth seeing

If you live anywhere near Chicago, I highly recommend the free exhibit at the Illinois State Museum Chicago Gallery in the Thompson Center downtown. The exhibit is called "Civil War Era Quilts."

I was able to take a few pictures without flash. These are the ones that spoke to me the most. All pieced ones because that is my thing, but there were some beautiful applique ones there too.


Double Irish Chain, c. 1862
maker unknown
 The blue in the small squares is from the same print, which was also used in the narrow border. I wonder if the lighter fabric in this quilt was once a darker blue that has faded. Was it once a two-color quilt? The Baptist fan quilting was fantastic. Hope you can see it in the detail show below.

Sorry, I didn't get the details on the maker.
I liked this one because the points were well chopped off in many places. It made me smile. I could relate to this quilter! A great looking quilt despite imperfections.


Dutch Rose Variation, c. 1855
made by Sarah C. (Vaughan) Black, 1834-1914
 Loved the colors and the design of this one. As you study it, you can see the careful color placement. The center stars alternate dark blue and pinkish star points, and in the outer circle pinkish points radiate from the center ones. The green parts looked like they were appliqued. The quilting is also amazing!

Broken Wheel Variation, 1855-1862
Made by Mary Elizabeth Byrod (Fortenbaugh), 1838-1929
This one I liked because it looked complicated, but really wasn't. In person you could see that the block is a nine-patch arrangement on point with square-in-a-square blocks in the corners, two rectangles in the outer middle positions, and white in the center. That's not so hard! I also like the way the whole thing is framed in half-square triangles.
You can see more pictures and read more about the exhibit in this post on Barbara Brackman's Civil War Quilts blog and in this post from another blog I follow. The exhibit runs through Sept. 14, 9 a.m. to 5 p.m. Mondays through Fridays except state holidays.

Friday, June 29, 2012

Aboriginal ???


The Aboriginal Quilt, 70 x 84 inches.
Quilted by Maggi Honeyman.
Looks like this one was about two years in the making. Started with a block made for fun and now has ended with the last binding stitches. You can read about the process here.
 
Love that fabric in the left corner. I think it's a Thimbleberries.
Also used toile, repros, text and part of a Halloween line!


The back. Not terribly exciting, but the fabric complements the front
(despite my photography skills) and was on sale.
I'm not sure what to call it. In my head it's The Aboriginal Quilt because I tried to use Aboriginal fabric in every block, but that name doesn't match the look. Suggestions welcome.

Friday, June 22, 2012

Aprons and pot holders

I turned my attention from quilts to aprons for a couple weekends, making gifts for friends.

This is for a friend who likes her cocktails. I had this great cocktail fabric in my stash and also found in there the perfect fabrics for the lining and the ties. I used this tutorial, which is very well written and allows for customizing the size of your apron.

I used the same pattern for this apron, which is backed in the same print as on the front. To go with this apron, I also made pot holders using this tutorial.
They all turned out great, and I should probably make a set for myself, but other projects are calling first.